†
The order
†
~ § ~
The order you want to do things in is the following:
- Prepare - SHAVE all the areas you will be applying latex. Moisturise all of you.
- Apply the latex
- Build the wounds
- Dry. Clean up a bit.
- Tear what needs tearing
- Apply the cream base makeup
- Apply the Greasepaint/bruise powders
- Apply some baby powder
- Apply the blood
- Stagger and moan lots
~ § ~
~ § ~Basic latex techniques~ § ~
For flaky/burnt skin, wrinkly face or a basic tear in the skin, apply a 2 or 3 thin coats of liquid latex.
If you want a wrinkly face, apply the latex with your cheeks puffed out as far as they will go. Do this one at a time...it's not easy to have both cheeks puffed for a long time. You can use cotton wool in your cheeks to make this easier.
To speed up the drying, use a hairdryer, though too hot a setting will make the latex go yellow. Once totally dry, let the air/cotton wool out of your cheeks, et voila! Wrinkly face. I find that women are often averse to this, possibly in case the wind changes and they are left that way.
If doing a tear, leave a small gap in the middle of the latex on the first layer where you want the tear to go, this will make things a lot easier later. Then one single-ply layer of toilet tissue in between layers, as it gives more texture to the 'skin'.
When applying the tissue, rip the edges roughly and tease the fibres a bit - this will help the edges blend better with you skin.
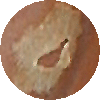 Let it dry. If making a tear, you want to do it while the latex is still slightly pliable...once it has set,
it's a bugger to rip it, which then requires delicate use of pointy objects. Rip the latex and tissue from the centre of the tear, and peel back. Make sure the flaps don't stick down to the tacky latex.
If you just want a rough, flaky, grazed skin effect, then when the latex is dry, rub it vigourously where you want the holes until it rubs off.
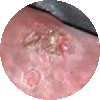 For some (rather stationery) maggots, apply black/green greasepaint first, then stick some grains of rice on after the first coat of latex, and when building up layers, miss small areas on top of the rice. When dry, peel back bits of the excess skin on top of the 'maggots, add some green ooze, and blood, with some bruising around the outside. Manky.
The makeup for these:
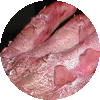 For the grazed skin, rub some red greasepaint on all the exposed 'raw' areas, stipple a bit of black or brown grease on top and rub into the edges as well.
If using proper theatrical blood, rub a thin layer of this on top and let it clot for a better texture and colour.
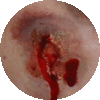 For the tear in the skin, you want the cut to look a bit deeper, so a base of black before stippling on red makes for a nice effect. Liberally add blood around the join of the 'skin', and rub the blood and some red greasepaint into the 'flaps', especially on the underside.
~ § ~Basic Makeup Technique~ § ~
The classic cliche regarding makeup, be it beauty or zombie, is "Less is more". This is not always true as far as the end result goes - I rather like the OTT thick makeup zombie effect,
but as far as the application goes it certainly rings true; you can always add more, you can't remove small amounts.
Whichever style of zombie you are going for, you will need a base application of white cream makeup to give you that unhealthy palour. You may find that this looks strange on the latex, and enhances the edges, but we will cover that with the greasepaint.
Once you have covered yourself in white, it is time to add a green tinge if you want one. Use the greasepaint with a soft sponge, and dab/stipple it on. If you rub with greasepaint it looks unnatural, often too thick, and hides the texture of your skin.
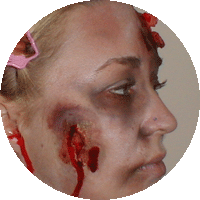 If you have used tissue on a wound, and there is a clear edge, a quick and easy way to cover it is with a bruise. Stipple on brown, then green, yellow and purple greasepaint onto an irregular area around the wound, covering the join of the latex. I like a faint green/yellow border around the edge of the main bruise.
Add a few more bruises, and then streak some black/brown, very lightly, using a stiffer sponge, for that 'fresh from the ground' look.
If you want a graze, theatrical blood on a comb, scraped across the face, will dry into very convincing roadburn.
Buy Accessories and Makeup